 |
| What You'll Be Creating |
Lumberyard is the latest 3D game engine to hit the market. It is a free, multi-deploy platform engine that offers deep integration with both the Amazon Web Services (AWS) infrastructure and Twitch to improve general online gameplay.
The Lumberyard engine technology is based on CryEngine. Amazon licensed one version of CryEngine and got complete access to its technology. That does not mean that CryEngine will leave the market, since Lumberyard only represents a branch of CryEngine technology. Both will be present and will struggle for market share.
Lumberyard is a powerful and full-feature AAA game engine that enables you to create games for the latest console generation (Xbox One and PlayStation 4). Mobile support is also a goal (the engine already has rendering options for iOS and Android).
Lumberyard's wide range of features include the following:
- State-of-the-art rendering techniques such as: physically based rendering, dynamic global illumination, real-time dynamic water caustics, HDR lens flares, motion blur, depth of field, among many others.
- Real-time gameplay editor that enables you to iterate on gameplay elements and immediately see the results.
- Robust Networking through the use of a flexible networking subsystem called GridMate. GridMate integrates with major online networking services and lets you handle peer to peer client server typologies with host migration.
- Modular Gems offers you a library of several pre-built features (camera, controls, and environment, among others) that can be used to start new projects quickly. Gems give you increased control over which technologies you want to include in your project.
- C++ development, and completely free access to its native C++ source code. The engine (and its full source code) is completely free to download and use. However, Amazon expects to generate money through the use of its AWS cloud computing service.
Who Should Read This Tutorial Series?
This tutorial series is primarily aimed at two groups of game developers:
- those who are completely unfamiliar with game engines at all
- those who are familiar with other game engines (such as Unity, Unreal Engine, or Cry Engine), but not with Lumberyard
Prerequisites
In order to install and have a smooth experience while using Lumberyard, your computer must achieve certain minimum requisites:
- Windows 7 or higher (64 bit versions only)
- Intel Quad-Core (i 2300), AMD Octo-Core (FX810), or better
- 8GB of RAM (at least)
- NVIDIA GeForce 6600Ti. Radeon HD790, or better
- 40 GB of disk space
- Visual Studio 2013 (Community, Pro, or Ultimate) with update version 4
Installation
The first step in this tutorial is to download Lumberyard. The current version (v1.1) is about 5.3GB file size. While the download is progressing, you should register with Amazon.com (if you don't already have an account).
To install Lumberyard, you can download a complete bundled file (.zip) or use an installer (.exe). The end result is the same, though; this tutorial uses the bundled version.
Step 1: Extraction
After the download is complete, extract it to a path that does not have spaces in the name. For example, do not extract the files to C:\Program Files\Lumberyard because the path has a space in it. An example of an acceptable location is C:\Lumberyard.
You now have Lumberyard installed on your computer, but before you can run it, you need to configure your environment and eventually install additional software.
Step 2: Configuration
The next step is to configure the environment to ensure that you have the necessary software to run the engine. For that purpose, you will use the Lumberyard Launcher (LumberyardLauncher.exe), which can be found inside the folder where you previously installed Lumberyard. Run the LumberyardLauncher.exe file and a similar interface should appear:
 |
Your next step is to select three options:
- Run your game project
- Run the Lumberyard Editor and Tools
- Compile the game code
 |
If you see at least one red cross, you should investigate what is happening. Click Next (bottom right corner) or click on the Install software option. A list of available and missing software is presented.
You need to install all the Missing software. Go ahead and click Install it for every single software that is missing. When you have a green check mark at Install software, click Next.
 |
Step 3: Lumberyard Launcher
The Summary interface shows an activity log (based on previously actions) and three major options:
- Configure project
- Launch Lumberyard editor
- A list of optional software you may want to install
 |
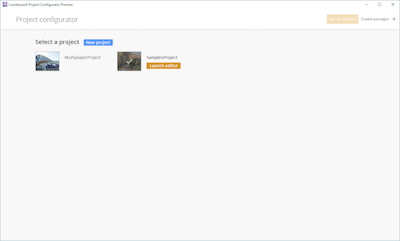
Initially you will only have two available projects (MultiplayerProject and SamplesProject). As the names suggest, the former is a multiplayer project, while the second is a more generic project (initially you will be using it).
Furthermore, if you notice, the SamplesProject is highlighted with a white check mark. It means that this project is the default project loaded by Lumberyard. Click on Enable packages.
 |
 |
 |
Step 4: Lumberyard Editor
A new interface (Asset Processor) should appear. The Asset Processor is responsible for loading Lumberyard default project assets (the one highlighted in the Project Configurator). The estimated time is about 10+ minutes.
 |
 |
Recall that, similar to Launcher, you can always access the Editor using the Editor.exe executable available in the folder dev\Bin64 under your Lumberyard installation path.
Written by Orlando Pereira
If you found this post interesting, follow and support us.
Suggest for you:
Code Your First Game: Arcade Classic in JavaScript on Canvas
Mobile Game Development Gamemaker Studio
Game Development Crash Course w/Corona SDK: You Can Do It!
Make VR Games in Unity with C# - Cardboard, Gear VR, Oculus
Learn to Code by Making Games - The Complete Unity Developer
No comments:
Post a Comment